
To Assign an Alarm Profile to a Point on SoniCloud, please follow the steps listed below:
1. On your main Area page, click the Edit button in the top right of the Grid View or Floorplan View.

2. A Toolbar will appear. Make sure Edit is highlighted.

3. Select the name of the point you would like to edit.
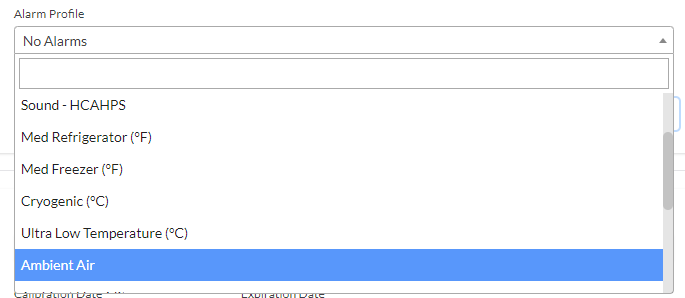
4. In the Alarm Profile section, select the drop-down menu under Alarm Profile.

5. Once the drop-down is selected, you will see a list of all available alarm profiles. Scroll through the list to find the correct profile. Click the name of the profile you wish to select.
If you do not see an alarm profile that matches your needed criteria, please go to the Alarm Profiles section and create the needed profile. Instructions to do that can be found here: Admin User Training: Creating an Alarm Profile.
Once your profile is created, repeat these steps.
6. You can use the "View Alarm Profile" button to verify your Alarm Profile shows the correct settings.
7. You can use the "View users that receive alarms on this point" button to verify Users will receive an alarm on this point if generated. This option will show which users are set to receive the alarm, and by what method they will receive it, either Text, Email, or Automated Phone Call.
8. Once you have finished assigning your Alarm Profile, click Save Point at the bottom of the page.

For additional assistance regarding Assigning an Alarm Profile to a Point please contact Sonicu Support for assistance. Sonicu Support can be reached by email at support@sonicu.com or by calling 317.468.2345. Sonicu Support is available M-F 8 AM- 5 PM EST.